Sunday, December 18, 2011

Happy Birthday, Russ!!

   It is my husband's birthday today... We celebrated it last night with a movie and dinner out with family. We had a wicked good time. The movie was "Sherlock Homes- Game of Shadow". We loved it.. Full of intrigue and surprises. We had dinner at Longhorn.. Yummy!!
Football addict...
   Today Russ gets to watch football all day.. He loves that, too. So I made him an appropriate card. Here it is:
I wish I could say that I drew the football player, but no I didn't.. I "googled" it and cut it out after I had blown it up a bit. Then I glued it to black cardstock. I typed in the sentiment and used my Spellbinders square die cut.
   I got the idea for this card from a card I saw on Splitcoast. Here is the linkFootball card
She did a great job on her card and I loved the stadium full of people, so I did the same  thing on the inside of this card.

Aren't they all cute!!!??
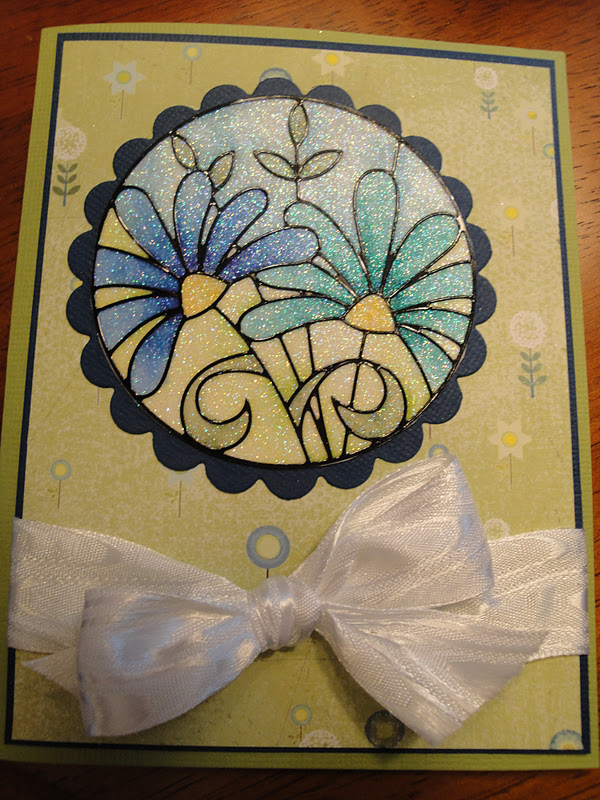


Pretty swirl...
   Lately I've taken to decorating the envelope, too. I just purchased this steel die cut from Stamped Designs in Dover, N.H. and wanted to use it on Russ's envelope. It's from Memory Box and I love it. I put a little glitter on it to give it a snowy effect.
   He got his card this morning and really liked it. I had fun using my thumb to make all the fans in the stadium and giving them faces. Thumbprint people are so cute.
   My Christmas shopping is done except for stocking stuffers. I think I will finish that this week at Reny's and Target. Happy Shopping!!

Monday, December 12, 2011

More Christmas Cards!!

      I have been working on finishing the last few Christmas cards of the year. I decided to change the design
Newest Design
'cause I was a little tired of making the same design... This is my new design.
   I used Penny Black's wreath stamp. I have not used this stamp, so I was excited to try it out. I stamped in SU Soft Suede ink. I added blue Stickles for a look of ornaments. A Copic marker gave the ribbon a blue effect. I love the Vintage look so I used Tim Holtz's Vintage Photo ink for a worn look. I used my special scissors to make the edges look more formal.
   The "Merry Christmas" stamp is from Stampin Up , too. I really love the look of this card. It is simple and yet kinda elegant.

   My sisters, Rochelle and Chris, and I  went to my favorite craft store in Dover, N.H. this weekend. We  went  to enjoy a class at Jeannette's Stamped Design shop. We learned a new technique from Lenora ,which I am dying to try on my own. Here are the cards that we made using this design three different ways:


Copic on glitter

Adhesive glitter
Glitter on die cut


The first card is so sparkly. We used Elizabeth's Craft Designs Peel -Off Stickers to adhere to a white piece of paper and then added the white glitter. We colored the glitter with Copic Markers. It really came out spectacular. Love this technique.
   Next, we used a Peel-Off Sticker that looks like a cupcake. We colored the inside of the lines with Mica Paint that Jeannette sells. It's wicked awesome since it gives a shimmery effect. The cupcake is sitting on a strip of adhesive that is covered with an special fine glitter found at Stamped Designs. You burnish it and it feels so smoother.
   The third card is so cute. The die cut is from Memory Box. They have a number of elegant die cuts. You cut it out of a small sheet of adhesive paper and peel of the back. You then dip it in the glitter and "Voila". It's glittery. Cutting out the bunny was the hardest part.
   We had wicked fun doing these three techniques. I now can use my Copic Marker Colorless Blender pen more often. If you are in Dover, check out Jeannette's store: Stamped Designs. She has a website, too. Hope your holiday shopping is going well..

Sunday, December 4, 2011

What a Great Weekend/Week!!!

   I had a great week and weekend... I was celebrating my birthday (along with my twin sister, Chris.) by being with family...love that.. My son gave me a wonderful $40.00 gift certificate to A.C. Moore and chocolate.. He knows just what I love.
   Then on the weekend the family loaded up the van and we went to Dover, N.H. to all my favorite stores there: Stamped Designs, Just the Thing, and The Rusty Bucket in Saco, Maine. It was a great time.
Finally ready for Thanksgiving.. Yeah!!

Long shot of kitchen.

Cambria:Quartz

New sink, too.

   I am so happy to report that the new countertops are in and looking good, I think .  Anyway, check out these pictures.
   Thanksgiving was so much better with the counter tops in and the kitchen functioning like a real kitchen. We are putting bead board as a backsplash as soon as we get a breather from the holidays. So much to do; so little time.


   I have finished my design for our Christmas cards
Here is the design for 2011.
Each morning I get up and work on putting them together. Morning is the best time for me.. I am wide awake and feel motivated to be creative... Creativity seems to wane as the morning moves on.. Here is my design. I love the funky fold, but it is so time consuming that I used the same design, but made it a regular card. See it here:
Less time consuming..
   I plan on going tomorrow to A.C. Moore with my gift certificate and get more materials to finish all my Christmas cards..  Hope you all had a great Thanksgiving. Christmas is around the corner. Can't wait...

Tuesday, November 22, 2011

November Disney Trip!!!

   Sorry it's been so long since I have blogged,but I've been on vacation to DISNEY WORLD!!! Most of  my family went with us... We had such a great time. Disney around the holidays is so beautiful. We stayed at Boardwalk which is a walk back in time. This picture is of the front of the resort, but the back of the resort is where you get to walk the boardwalk and see all the shops, vendors and performers. At night the boardwalk is the place to be. You can rent a four seater bike and go all around the boardwalk. My sisters did this. I was too pooped.
Front of the resort


Love the lobby.
 The lobby at Boardwalk is so pretty. I love just walking through it to see all the sights and sounds of the day. It's one of the prettiest resorts that Disney has on the property.
The Festival of the Lion King was one of our favorite stops at Animal Kingdom. The performers had great voices and did a great job singing the famous songs that this show is known for on Broadway.
Amazing robotics

Anyway we had a great time in Florida at Disney. Here are a few more shots of our trip. I wish everyone could go and experience what Disney has to offer. I am just a kid at heart and love to go every year that we can do it. Now I have to get to work on our Christmas cards for this year. That will be my next post.
Another performer at the Lion King show
Tree of Life at Animal Kingdom
Aren't they cute...
At Hollywood Studios

Saturday, November 5, 2011

Biggest Yard Sale!!

Great Find!!
Couple weeks ago I went to the Cumberland Fairgrounds in Cumberland to attend the "Biggest Yard Sale" in Maine. My husband, Russ, and my sister, Adrianne, went along, too. We had great fun checking out all the stuff we could have bought, but didn't... We did find some great stuff that we did buy... Check it out...
   Adrianne found this great Coke box for only $12.00. She found it under another box that was broken. She was lucky no one else found it...
Repurposed furniture
   A number of booths had furniture that had been worked on and painted. It was really great to see people reusing items and not just throwing them away in some landfill somewhere. Wish I could have used them, but alas I have only so much room.
Lovely furniture


Loved this booth!
    Some booths were really full of great things and some were not anything I was interested in. I did end up buying a lovely bowl and a wooden hassock that goes with the Adirondack chairs that we have outside. Russ found that for only $3.00. All in all it was a lovely day for looking.
Neat, huh?
   I wish I had bought this architectural piece, but she was asking $18.00 and at that moment it seemed like it was too much. Wish I bought it now.. Oh well...there's always next year.

Monday, October 31, 2011

Happy Boo Day!!!

Another Haunted House
   I finished my last Halloween card for the year. I didn't do it in time to send it to my "kids", but next year I'll be ready....

  I used my Sizzix die cut again with a different white inked flourish this time. I used my Inkadinkadoo spider flourish... Real spooky....
 
    I backed the windows with yellow paper. The witch stamp is from Inkadinkado, also. I sponged the back ground with distressed inks peeled paint, vintage photo, and mustard seed. I used the same technique my blog friend, Donna used. Check out her Halloween card which is way better than mine. Her link is here:Donna's Designs

   I used the fence die cut from Sizzis and tried to make it look worn and used..

    Hope everyone has a Wonderfully Spooky Halloween today.
Our table


     This is our table at a recent Holiday Fair in Topsham.  We met some nice people and had some great snacks. My sister, Rochelle, and I had some good fun. We might try to do another fair sometime in the future.. maybe...


Tuesday, October 25, 2011

Swan Anniversary Card!

Anniversary Card

   I just finished this card for our upcoming Christmas Fair at the Cornerstone Baptist Church in Topsham. My sisters and I are just starting to sell our papercrafts at fairs in the area. Our first one was last week at our friend, Cindy's house. It was a good start. 
   I love making these swans. I made them from a tutorial that I purchased from Valita's blog. Here is the link to her blog. Her directions are really easy. Valita's Designs 
   I used some white roses and leaves that I had already purchased from somewhere. I probably got them from Tate's in Bath, Maine. They are having a fabulous sale right now. You gotta go in... and check it out.
Our table...
   Here are some pictures of our table from this last weekend. We had alot of fun setting the table up and talking to people.  We hope to do well at the next Christmas fair in Topsham this coming weekend from 10:00 to 2:00. The flyer is below. 
   Wish us luck with our second attempt to get into sales. Hope to see you there.


 Our 5th Annual Holiday Open House is this weekend.
Those of you who have attended in the past, know that we are growing every year.
See all the details below and in the flyer attached:
Saturday, October 29th
10 am – 2 pm
Fellowship Hall
(Cornerstone Baptist Church)
771 Lewiston Rd. (Rt 196) Topsham
As always, your favorite Direct Sales Reps and other in one place at one time!
Start your Christmas Shopping early, or finish it up right here.
Refreshments, specials and door prizes!!!
We hope to see you there...

Sunday, October 23, 2011

Beautiful Work!!

Finished project/Beautiful!!
   My husband, Russ, has just finished our pantry area in our kitchen. There was a desk area there originally, but we never used it. We were in desperate need of more pantry space that was really organized. We went to Lowe's and bought a pantry and cabinet. We had them paint it in a mushroom color. Well, here are some pics to show you the progress:


Before!

Russ has worked hard to really make the pantry look built-in to the kitchen. I love how I can showcase my Mom's teapots.
Beginning the process....
   The pantry is a wonderful addition because of the shelving system. You can't see it well, but in behind the shelves you can see are more shelves running across the back.
   I just love this pantry area. I designed the look with help from Russ on the finer points of construction. We make a great pair, don't you think?
Another angle...

Inside pantry!


Sunday, October 16, 2011

Halloween preparations!

Spooky, huh?
   I have finally started my Halloween cards that I plan on selling at the HOLIDAY SHOPPING SPREE next week in Berwick, Maine.  I really love to make these cards.
   I used Sizzix's die cut of a Haunted House. I put it in the picture for you to see what it looks like.
   I added the ghosts. One is another die cut from Sizzix and the other, in the window, is an upside down owl with eyes. ( My sister, Rochelle, showed me this one.)
   I stamped a white flourish over the house with SU white ink. The flourish is from Inkadinkado.
   The sentiment is from gStudio and I aged the paper with Tim Holtz's Distress inks: Vintage Photo and Mustard Seed. Ranger's Crackle Paint called "Rock Candy" was used to make it look even older.
   Martha Stewart's punches for the black trees and the web around the border was used for a more spooky effect.
   I used Tim Holtz's die cut that is a small easel. It works well when you want your card to stand up and it closed up flat to send through the mail.
   I really like this card, if I don't sell it, I will send it to someone for Halloween. Whoooo will it be????
Another view!
Back view!

Friday, October 7, 2011

Saying Good bye!

Envelope and card.
    Members of our church are moving to Massachusetts  to be closer to their son. We are having a good -bye party for them after church so I have been working on a card that will tell them how much we are going to miss them.  Gail and Truman have been such a wonderful blessing to us and to my parents. We are going to miss them alot.

   I found this card and cased it from a blog that I have lost the address to, so I cannot link to it. I hope they will forgive me for not mentioning them. It's a great design. I changed it slightly, but it's essentially the same. I also wanted to add some drama to the envelope, too.  On the envelope I just continued the theme and made a few more trees with autumn leaves from the Branch Out set.
     I used Stampin Up's Branch Out set. I love the tree in this set. I also used the stamps for the sentiments  from Short & Sweet and Upsy Daisy. It's a fun card to make since you can use different patterned paper of the hills.
   On the envelope I just continued the theme and made a few more trees with Autumn leaves from the Branch Out set.
    I found a poem and changed a few words here and there to help make
Praying for a smooth move.
it apply to our friends' move. I used the butterflies from the stamp set.
   I didn't have room to add our names to the bottom, so I used my Spellbinders die cut to add it to the top with our names typed out.
I hope they like the card because it expresses how we all feel about them. They will be sorely missed.

Halloweening...

   I have been working on making my Halloween coffins for the upcoming sale in Berwick. (See previous post.) I used Martha Stewart's template from her website. Here it the link, if you would like to make some of your own. It is really not very hard to do.Martha has a video to help you with the construction.

Halloween treat boxes


   It is best to use double sided paper with black being the other side, but I didn't have any so I just glued a sheet the size of the template to the other side.
   Before I constructed my box I added the details you see in the picture. Using Stampin Up's white ink I stamped the cover with my Inkadinkadoo clear stamps.   Great fun!!.
   Next I made these flowers from my punches with silver sparkly paper and added them to the coffins. 
   My spider is from Sizzix. I added the white eyes with my white enamel accents. I picked up these cute skeletons from The Dollar Store. I plan on putting one in each coffin with some candy for the upcoming sale. I think kids will love these.. Thanks, Martha!

Tuesday, October 4, 2011

Rose Boxes!!

A field of roses...
  Whew! I finally finished the last Rose Box for my friend, Cindy's Holiday Shopping Day on October 23 from 1:00 to 4:00 in Berwick, Maine . (See previous post.) I have been making these rose flowers for the last few days. I love how easy they are to make  because of a great tutorial I found at Scrappin Mama's blog. Her video can be found here, if you are interested in trying some of you own.Scrappin Mama's Rose Video 
   I tried to choose paper that would match the boxes.  I used scor pal tape to adhere the petals to the circle. It seem way easier than the glue the video sugests.
   I added a little glitter to some of the petals for a little holiday bling. The leaves are from  a Martha Stewart punch.
   I think my favorite is the pure white rose. I used photo paper to give it a little shine.
      I did not make the boxes, but altered them to make them a perfect box for gift giving for any occasion.
      I am ready to work of my coffins that I plan on selling at Cindy's. Halloween is next!!!

Monday, September 26, 2011

Signs of Fall!

   I have been working on getting my cards ready for the Holiday Shopping Day at my friend, Cindy's house in Berwick, Maine. ( See previous post.) This is a card I cased from a gal named CONNIE... Really like her name. Anyway, she has a wicked cute card using this tree fold. Love it... Had to case it. You can find it here at this link: Connie's Tree Card  .If you go to her blog, she has the template for the folds. It is very easy to follow.
   You have to use double sided paper to get the different patterns to show up. I love using this paper because I don't feel like I am wasting it when I only use one side.
    I used my Cuttlebug embossing folder on some sparkly paper to make it look like swirly snow. Then I layered ripped paper below it to look like a snowy landscape.
   I added dots of Inkessentials White Enamel Accents to the trees. A star punch at the top gives it a Christmas look.
   The stamp "Season's Greetings" is from Stampin Up, but I don't know which set it comes from. If you know, please let me know so I can put it back in its case.
   I really like how this card came out. I may use it for my own Christmas cards this year... Thanks alot , Connie for sharing on your blog.

Sunday, September 25, 2011

Holiday Shopping at its Best!! Join us!!!

HOLIDAY SHOPPING EXTRAVAGANZA!!!!

   My friend, Cindy, is having a One Stop Holiday Shopping  party at her home  in Berwick Maine AT 15 KEAY ROAD.   For those of you in the area it will be on October 23rd  from 1:00 to 4:00 p.m. There are a wide variety of items to choose for your holiday shopping. Here is a short list: 
Custom made embroidery items.. such as towels, table runners, aprons, etc.
 Tastefully Simple foods: dips, sauces, soups, breads.. yummy!
Uppercase living: meaningful words and pictures to decorate your walls, cabinets, glassware, etc.
  Blume jewerly  A new line for Uppercase Living: very pretty indeed!
  Miche Bags: Why have a million bags when you can buy one base ans switch the outside with magnitized shells. 
  Hand crafted cards, boxes, and ornaments for the upcoming holidays by Calla Lily Studio, Creative Corner Studio, and Taken Wings.
 Heritage Maker samples and demonstration for those of you who like working on the computer to get things done.
Hand made totes made by Joyce...
Scentsy for those who like the the smell of candles and no worry of flames or fire.

So be sure and stop in if you are in the area and check out all the great items for sale way in time for the upcoming holidays. Hope to see you there. I will be showing samples of our cards on my blog in the weeks to come.

Monday, September 19, 2011

Another Wedding Card!

The Wedding Card
   I almost forgot about this card I made for my niece, Jill.  Her cousin got married last week and Jill asked  me to make a card to give to her.
  I was inspired by a card I saw on Spiltcoast Stampers. This is a great site to view lots of work by talented people. I think this card by Cathleen is way better than mine. I loved the ribbon and flowers are on the right side. Take a look at Cathleen's card.
Cathleen's wedding card
   I used some designer paper I had sitting around and added the fleur di lis border punch by Martha Stewart.
I had some lace and added pearls to give the card a more regal flavor. Prima flowers were added to the ribbon. I like Cathleen's flowers better.
   The stamp "Mr & Mrs." is from Stampin Up's set called All Holidays, I believe.
   Jill thought the card was really pretty. I hope her cousin did , too.
 

Tuesday, September 13, 2011

Cindy's Owls

   It was my niece, Cindy's birthday last week. Her mother asked me to make a card for her. She has many interests, but she particularly loves owls. So I cased this card from the Splitcoast Gallery. It is such a cute card. Check it out here...Owl Window Card   I didn't have the same materials, so I improvised. I used Cuttlebug's embossing folder for the tree accent. I "rubbed" Tim Holtz's distress ink pad, Mahogany, over the surface.
   I cut out the center of the card with my rectangular Nestability die cut. Also using the same technique I cut the branch free hand and attached to the back of the window part.
   I added the tree leaves using the scalloped punch from Stampin Up. Again the distress ink Vintage Photo around the edges of each scallop gave the desired effect.
   I used SU's owl punch and put them together in a similar way that the cased owl card looked. I added the hearts and kept their eyes quite large. I cut a scalloped circle out of the brown paper and trimmed it to look like a feathered arm. Martha Stewart's balloon punch was used and the balloon wrapped around the owl's wing gave the card a more festive look along with the cute party hats. I only had Stickles to give the hats a pompom.
   The banner is from Spellbinders and the stamp is from Hero Arts.
   Cindy's family celebrated her birthday last night. I know it was a joyous occasion. Happy Birthday, Cindy!!!

Thursday, September 8, 2011

A Wedding Card

Happy Wedding Day!!
   My sister-in-law, Charlotte, asked if I wouldn't make a card for her to give to her niece who is getting married this weekend. Poppies are a theme for the wedding since this flower was her father's favorite. So I incorporated a poppy into my design. Luckily I had a stamp that is what I think a poppy looks like. It's from Stampin Up's Blooming Beautiful set. This is the first time I have used this set, so technically I am working on my goal to use at least all of my stamp sets at least once.... Yeah!
   I found my Cuttlebug embossing folder that has that nice oval shape in the middle. Love this one...Using my Nestabilities I cut a white oval shape and a cream colored looped oval shape to place in the middle of the embossed design.
   I stamped the poppy and colored it with my watercolor crayons using my watercolor pen. Then I stamped Congratulations from the Well Scripted set from Stampin Up, too.
The inside...
   I added a white ribbon I made with my Bow Easy and lacy pearls I had purchased from Tate's in Bath. This completed the outside.
   On the inside I found a wedding poem online and just mounted it with black SU paper. The wedding designer paper just accented the whole page to give it a little more color.
   I decided to add a little more to the envelope. I stamped the poppy again and colored it with watercolors again. Added the designer wedding paper and used Edwardian script to write their married names. I didn't take a pic of this,but I used Martha Stewart's border lace punch to punch out the envelope flap. I really liked this touch.
   I am going to make another wedding card so that Charlotte can pick  the one she wants. Her daughter, Jill, said she would use the one her mother didn't pick. So check back to see what I came up with for the other card.

Wednesday, September 7, 2011

He's turning 30!!!

A smiling computer....
   I have been working on my son's 30th birthday card...He works at Unum on computers all day.. He loves it...so I tried to think up a card using a computer as the theme. I typed in computer image and found one with a smile on it.. so I gave it a try. This is what I came up with for his card.
   I used Stampin Up's Pretty Petals background stamps to make it look like wallpaper. I pieced together the monitor screen: easy enough. Then I use SU word window punch for the place for the computer's buttons. I printed out and scaled down the computer keyboard and added it below the monitor. The smile was a little tricky , but I think it came out okay.
   I started working on the inside of the card by taking white paper and folding it for a pop up card. I again made a simpler monitor screen and attached that above the keyboard. I used Cuttlebug's embossing folder to make the table look wooden. I used Distress Inks from Tim Holtz to accent the raised wood.
   The balloons were punched from Martha Stewart's punch in different colors and patterns.
The mouse I thought was a clever addition!


   I used Stampin Up's Baroque Motif's flourish to add a little birthday look to the inside. I used SU real red ink and added touches of many colored dots.
   I found the sentiment online and thought it was perfect: "Another Birthday? That Bytes! Happy 30th"
Wicked fun making this one for him.. Hope Nathaniel likes it....

Thursday, September 1, 2011

He's Back!!!

   Before I retired I had been teaching for 32 years. In those years I came across a few great principals. Mr. Manuel was one of those... He has been hired at the Superintendent of RSU #1, and I am so happy for him and for the teachers who will be working with him.
   A few of us retired folk who worked with him in the past wanted to give him a card and a gift card to give him a note of encouragement. I made this card to do just that. What fun it was to make.
Love these owls!

   I used Stampin Up's Owl Punch and Martha Stewart's Bird Border Punch. My largest circular Spellbinder made the full moon. I also used Spellbinder's banner dies to ask the questions.
  On the inside of the card I wanted it to hold a gift card. I used my small envelope template I have and just cut off the top flap.
   I made another owl from Stampin Up and added the "A little bird told me" with another Spellbinder banner.

   I got the poem off the internet and changed it to apply to this Mr. Manuel's situation.
We will be giving it to him before the start of school. I hope he gets a chuckle out of it and enjoys his first year in charge of a large school district. Good luck, Mr. Manuel!

Getting Ready!!

    I have been getting ready for an upcoming craft fair at USM on April 22nd. My sisters and I are excited about doing a spring fair. We di...