Showing posts with label Christmas cards. Show all posts

Monday, November 11, 2013

More, more, more Christmas!

   I have been working soooo hard on getting ready for this Christmas Holiday Shopping Event being held at the Topsham Cornerstone Church in Topsham, if I haven't mentioned this enough. My sisters and I are working round the clock to be ready. It is kinda fun doing the projects we have wanted to do, but now have a deadline to do it.. If my cards don't sell I will use them for my Christmas card this year. Good thinking, huh?
  This is what I have been working on : Card in a Box, Envelope Albums, Treat Boxes, Christmas Cards, and an Album in a Box ; just to name a few. I have  been busy.
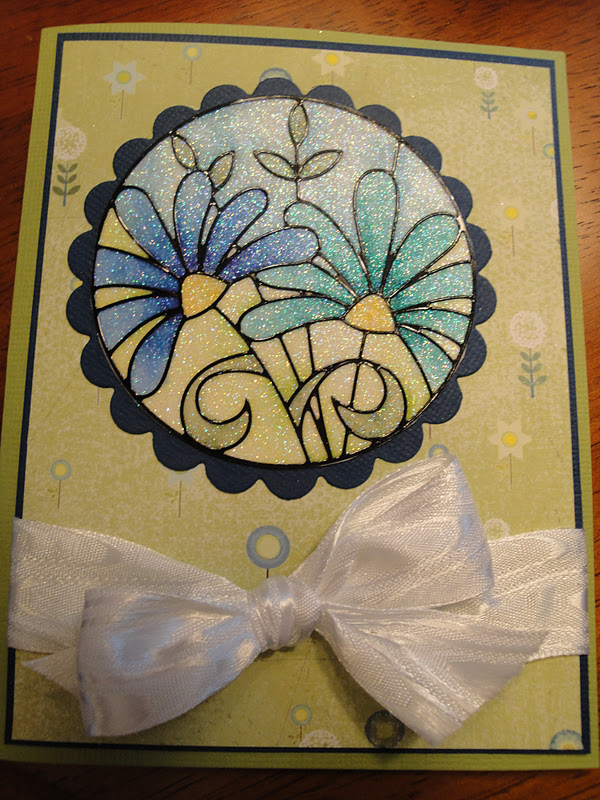
5 cards with envelopes for 15.00.
These cards were really fun to make. I think 3.00 a card for buying 5 at a time is  not bad.
  I have made one more of the Card in a Box cards.


More cards....
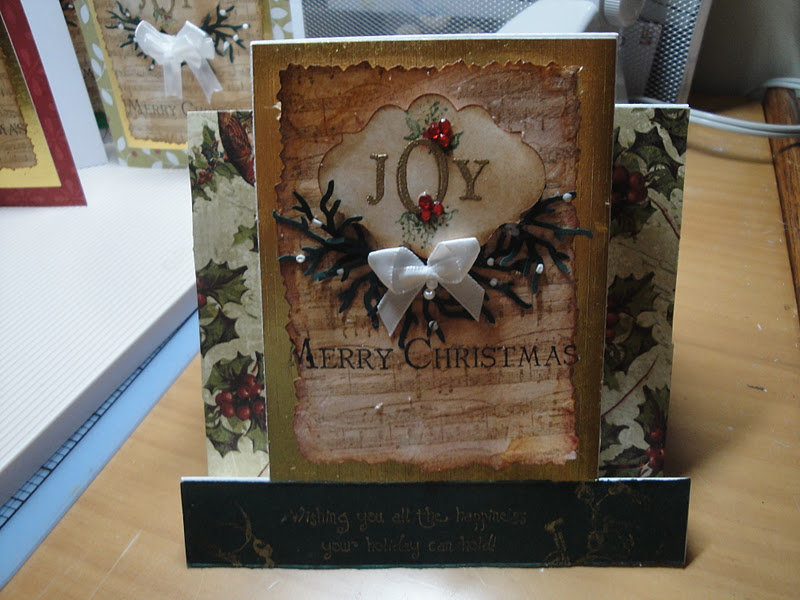
Card in a Box that folds for sending
They are easy to make but the theme and the elements of the theme are time consuming. I made this box to be elves going through gifts. However, I think the elf hat covers his ears, so I am going to cut his present ears off ( Ouch!) and put them lower. My sister, Chris, agrees with me. She thinks he looks like the Grinch.

 
Card in a Box winter scene
The second Card in a Box is a winter scene with a deer and a bunny. I used white Flower Soft for the snow. I like the effect it gives the whole card.
  I plan on making at least one more. I hope it doesn't take all day. I am using Graphic 45 on the last one. I love that paper because of the quality and the artistic elements. So pretty.


Christmas Album in a Box

Opened Box with pages showing

Tags on another page

Flap on a page for more pics

Last page with tags
Love the boxes that have an album hiding inside. The box is easy to make using black chipboard. I bought the directions from Paper Hoarder, I think that is the name. Doesn't sound right, though.
  
Pyramid Treat or Gift Boxes


 I have been decorating these pyramid treat boxes or you could put a gift inside. One of the sides comes open when you remove the ribbon. I love Christmas paper especially if it sparkles. I think they look festive. If they don't sell, I will decorate my fireplace mantel with them for the holidays.
Christmas Tags
I discovered I love making tags. They are so cute. I am not sure which ones are my favorite. The Santa tags came out great. I used Enamel Accents for the buttons. On the snowflakes I just used a Sizzix die cut for the snowflake and added gems and a sentiment. Love 'em.
  I have to go rake leaves now. I hope this is the last time. Some leaves just don't want to fall. It will be good exercise and then back to work. I will be making another  Album in a Box and another Card in a Box. I hope to finish decorating my cigar boxes , too.
 Hope you are getting excited for the holidays to come. I know I am.

Sunday, November 3, 2013

Christmas Craft Fair Season

   My sister's and I have decided to have a table at the Holiday Shopping Event at  Cornerstone Baptist Church in Topsham, Maine ( Rte.196. 9-1 o'clock) on November 16th. We are working feverishly to make all the projects for our table. We got together this weekend to see what we have so far.
  I have been working on making the Envelope Mini Albums. This is a new project for me. I discovered the tutorial on Pinterest and kinda like how they are coming out. This is the first one that I have finished. I am working on a second one and have that one almost done.
Envelope Mini-Album
I used Graphic 45 French Country paper. Love it.. The paper is absolutely gorgeous. The cover a embellished quite a bit, but love how it came out.
Inside pages

Inside pages with tag

Inside pages with photmat
 The pages are large enough for pictures, tags, and adding whatever you want. I think some  people might like these better than the 6 x 6 because it will hold just a few pictures. Sometimes that is all you need . It could be used as a travel journal, too. You can add whatever you want into the pockets. I hope to make a few more for people to buy. If they
Inside pages with belly band
don't sell, I will keep them for my travels.
   Betsy over at Paper, Scissors and SuperHeroes has a wonderful written tutorial on how to make these mini albums. Here is her link: Paper, Scissors, Super Heroes.

My next project I think is so cute. My sister, Chris, over at Calla Lily Studio, discovered the directions for A Card In a Box. The box is really simple. It's the "stuff" you put inside that takes all the time. Usually it is a punch art theme. I chose the Nativity Scene I found on Pinterest. Here is a link to her card. She has done a great job with these figures. I tried to case has as best as I could.
   I used my Spellbinders circle die cuts, and book die cut. I also
Card In a Box
 used my scallop punch for the little lamb.
   I typed the verse on the computer and used Tim Holtz's crackle paint for an aged look.
   The box video tutorial is great except the gal is from the U.K. and her measurement are in metrics. Check out  my sister's blog for a link to the video and the conversion into inches.
Calla Lily Studio We hope to have ten different ones. Chris has some great themes for her boxes.
                                                       What I really like about this card in a box is that it folds up and fits into a 6 x6 envelope.                                                  
The sentiment on the back.
Folded card
Christmas!!
We went to Pier One that just opened in South Portland to get some inspiration and that Christmas feeling in November. What a great place! It was way too busy. Don't go there on a Saturday. I got great ideas for more boxes and albums. Well, gotta get back to work. I will have more items to share in a few days.November 16th will be coming fast and furious.

Monday, December 12, 2011

More Christmas Cards!!

      I have been working on finishing the last few Christmas cards of the year. I decided to change the design
Newest Design
'cause I was a little tired of making the same design... This is my new design.
   I used Penny Black's wreath stamp. I have not used this stamp, so I was excited to try it out. I stamped in SU Soft Suede ink. I added blue Stickles for a look of ornaments. A Copic marker gave the ribbon a blue effect. I love the Vintage look so I used Tim Holtz's Vintage Photo ink for a worn look. I used my special scissors to make the edges look more formal.
   The "Merry Christmas" stamp is from Stampin Up , too. I really love the look of this card. It is simple and yet kinda elegant.

   My sisters, Rochelle and Chris, and I  went to my favorite craft store in Dover, N.H. this weekend. We  went  to enjoy a class at Jeannette's Stamped Design shop. We learned a new technique from Lenora ,which I am dying to try on my own. Here are the cards that we made using this design three different ways:


Copic on glitter

Adhesive glitter
Glitter on die cut


The first card is so sparkly. We used Elizabeth's Craft Designs Peel -Off Stickers to adhere to a white piece of paper and then added the white glitter. We colored the glitter with Copic Markers. It really came out spectacular. Love this technique.
   Next, we used a Peel-Off Sticker that looks like a cupcake. We colored the inside of the lines with Mica Paint that Jeannette sells. It's wicked awesome since it gives a shimmery effect. The cupcake is sitting on a strip of adhesive that is covered with an special fine glitter found at Stamped Designs. You burnish it and it feels so smoother.
   The third card is so cute. The die cut is from Memory Box. They have a number of elegant die cuts. You cut it out of a small sheet of adhesive paper and peel of the back. You then dip it in the glitter and "Voila". It's glittery. Cutting out the bunny was the hardest part.
   We had wicked fun doing these three techniques. I now can use my Copic Marker Colorless Blender pen more often. If you are in Dover, check out Jeannette's store: Stamped Designs. She has a website, too. Hope your holiday shopping is going well..

Sunday, December 4, 2011

What a Great Weekend/Week!!!

   I had a great week and weekend... I was celebrating my birthday (along with my twin sister, Chris.) by being with family...love that.. My son gave me a wonderful $40.00 gift certificate to A.C. Moore and chocolate.. He knows just what I love.
   Then on the weekend the family loaded up the van and we went to Dover, N.H. to all my favorite stores there: Stamped Designs, Just the Thing, and The Rusty Bucket in Saco, Maine. It was a great time.
Finally ready for Thanksgiving.. Yeah!!

Long shot of kitchen.

Cambria:Quartz

New sink, too.

   I am so happy to report that the new countertops are in and looking good, I think .  Anyway, check out these pictures.
   Thanksgiving was so much better with the counter tops in and the kitchen functioning like a real kitchen. We are putting bead board as a backsplash as soon as we get a breather from the holidays. So much to do; so little time.


   I have finished my design for our Christmas cards
Here is the design for 2011.
Each morning I get up and work on putting them together. Morning is the best time for me.. I am wide awake and feel motivated to be creative... Creativity seems to wane as the morning moves on.. Here is my design. I love the funky fold, but it is so time consuming that I used the same design, but made it a regular card. See it here:
Less time consuming..
   I plan on going tomorrow to A.C. Moore with my gift certificate and get more materials to finish all my Christmas cards..  Hope you all had a great Thanksgiving. Christmas is around the corner. Can't wait...

Been Way Too Long!

New craftroom space  Sorry it has been so long since my last post. Not sure what has kept me from posting. I have still been crafting in my ...